As a reliable AZS block supplier, I understand the importance of a proper installation process for AZS blocks. In this blog post, I'll share detailed steps and essential tips on how to install AZS blocks, ensuring you get the best performance from our high - quality products.
Understanding AZS Blocks
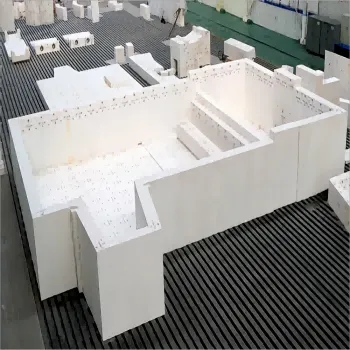
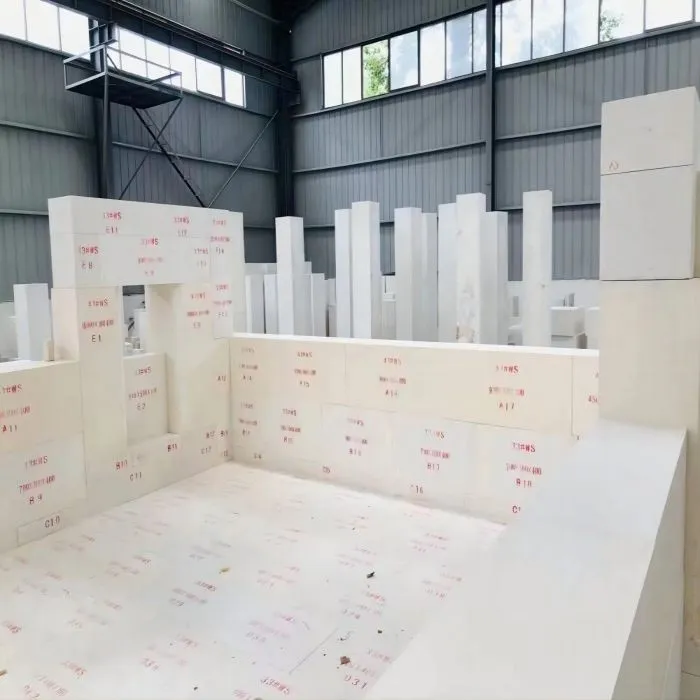
Before we dive into the installation process, let's briefly understand what AZS blocks are. AZS blocks, also known as AZS Brick, are made of alumina, zirconia, and silica. These refractory materials are renowned for their excellent resistance to high temperatures, corrosion, and mechanical stress. They are widely used in glass furnaces, cement kilns, and other high - temperature industrial applications. Zirconia Corundum Brick and Zirconium Corundum Brick are also related products with similar characteristics and are often used interchangeably depending on the specific requirements of the project.
Pre - installation Preparations
Site Inspection
The first step in installing AZS blocks is to conduct a thorough site inspection. Check the surface where the blocks will be installed. It should be clean, flat, and free from any debris, grease, or loose materials. The surface's levelness is crucial as any unevenness can lead to gaps between the blocks, which may compromise the overall integrity of the installation. Use a level and a straightedge to measure the surface and identify any areas that need to be corrected.
Block Preparation
Examine each AZS block carefully before installation. Look for any cracks, chips, or other defects. Remove any damaged blocks from the batch as they can weaken the structure. If necessary, clean the blocks with a dry brush to remove any dust or dirt that may have accumulated during storage or transportation.
Tools and Materials Gathering
Gather all the necessary tools and materials for the installation. You will need a trowel for applying the refractory mortar, a rubber mallet for gently tapping the blocks into place, a measuring tape for accurate placement, and safety equipment such as gloves and goggles. Make sure you have an adequate supply of refractory mortar that is compatible with the AZS blocks. The refractory mortar should have similar thermal properties to the blocks to ensure a good bond and prevent differential expansion during heating and cooling cycles.
Installation Process
Mortar Application
Start by applying a thin layer of refractory mortar on the installation surface. Use the trowel to spread the mortar evenly, ensuring a thickness of about 3 - 5 mm. The mortar should be applied in small sections at a time to prevent it from drying out before the blocks are placed.
Block Placement
Carefully place the first AZS block on the mortar - covered surface. Align it with the reference lines or marks you have made on the installation surface. Use the measuring tape to ensure accurate spacing between the blocks. Once the block is in position, gently tap it with a rubber mallet to ensure good contact with the mortar and to level it with the adjacent surface.
Joint Filling
After placing each block, apply mortar to the vertical joints between the blocks. Use the trowel to fill the joints completely, making sure there are no voids. The joint width should be consistent throughout the installation, usually around 2 - 3 mm. This uniform joint width helps to ensure even expansion and contraction of the blocks during thermal cycling.
Laying Successive Blocks
Continue placing the AZS blocks row by row, following the same process of mortar application, block placement, and joint filling. Make sure to stagger the joints between adjacent rows to increase the structural stability of the installation. This brick - laying pattern distributes the stress more evenly across the structure and reduces the risk of cracking.
Corners and Edges
When installing AZS blocks at corners and edges, pay extra attention to the alignment and joint filling. Cut the blocks to the appropriate size if necessary, using a diamond - tipped saw. Make sure the cut edges are smooth and clean before placing them in position. For corners, ensure that the blocks are at a perfect 90 - degree angle to maintain the overall shape and integrity of the structure.
Post - installation Checks
Visual Inspection
Once the installation is complete, conduct a visual inspection of the entire structure. Check for any gaps, uneven joints, or misaligned blocks. If you find any issues, correct them immediately by adding more mortar or adjusting the position of the blocks.
Curing
Allow the refractory mortar to cure properly according to the manufacturer's instructions. This usually involves a period of controlled drying and heating to ensure that the mortar develops its full strength. Avoid subjecting the newly installed AZS blocks to high temperatures or mechanical stress during the curing period.
Maintenance and Troubleshooting
Regular Inspections
After the installation and curing process, it is important to conduct regular inspections of the AZS block installation. Check for signs of wear, corrosion, or cracking. Inspect the joints for any signs of deterioration. Early detection of problems can prevent more serious issues from developing and extend the lifespan of the installation.
Troubleshooting
If you notice any cracks or damage to the AZS blocks, it is important to address them promptly. Small cracks can sometimes be repaired by applying a refractory patching material. However, if the damage is extensive, you may need to replace the damaged blocks. In case of corrosion, identify the source of the corrosion and take appropriate measures to eliminate it, such as adjusting the operating conditions or using a protective coating.
Conclusion
Installing AZS blocks is a precise process that requires careful planning, proper preparation, and attention to detail. By following the steps outlined in this blog post, you can ensure a successful installation of our high - quality AZS blocks. Our company is committed to providing you with the best products and technical support. If you have any questions about the installation process or are interested in purchasing our AZS blocks, please feel free to contact us for further discussions. We look forward to working with you on your next project.
References
- "Refractory Handbook" by ABC Publishing
- Industry standards for refractory installation issued by the relevant professional organizations.